Deploying Machine Learning models using AWS Lambda and Github Actions - A Detailed Tutorial
Quite a while back, I had written a post in which I described how to package your Machine Learning models using Docker and deploy them using Flask.
This post, through a PoC, describes -
- How to package your model using Docker (similar as last post)
- How to push the Docker container to Amazon ECR
- Add a Lambda Function for your model
- Make a REST API using Amazon API Gateway to access your model
- Automate the whole process using Github Actions, so that any updates to the model can take effect immediately
- Make a Streamlit app to make a UI to access the REST API (for the model deployed on AWS)
All the code can be found in my Github repository.
The repository also contains the code to train, save and test a simple ML model on the Iris Dataset.
The Iris dataset is a small dataset which contains attributes of the flower - Sepal length, Sepal width, Petal length and Petal width. The goal of the task is to classify based on these dimensions, the type of the Iris, which in the dataset is among three classes - Setosa, Versicolour and Virginica.
Package Requirements
- An Amazon Web Services account (I intentionally use a simple ML model to deploy as it remains in the AWS Free tier constraints across all the services I mention above. Larger models will require more storage and hence could be chargeable.)
- Python 3.6+
- A simple
pip install -r requirements.txtfrom the https://github.com/shreyansh26/Iris_classification-AWS-Lambda-PoC/tree/master/iris_classification directory will install the other Python packages required.
Steps to follow
In this PoC, I will be training and deploying a simple ML model. If you follow this tutorial, deploying complex models should be fairly easy as well. (I had to scratch my head a lot though!)
1. Training and Deploying the model locally
- Clone this repo
git clone https://github.com/shreyansh26/Iris_classification-AWS-Lambda-PoC - Create a virtual environment - I use Miniconda, but you can use any method (virtualenv, venv)
conda create -n iris_project python=3.8 conda activate iris_project - Install the required dependencies
pip install -r requirements.txt - Train the model
cd iris_classification/src python train.py - Verify the model trained correctly using pytest
pytest - Activate Streamlit and run
app.pystreamlit run app.py
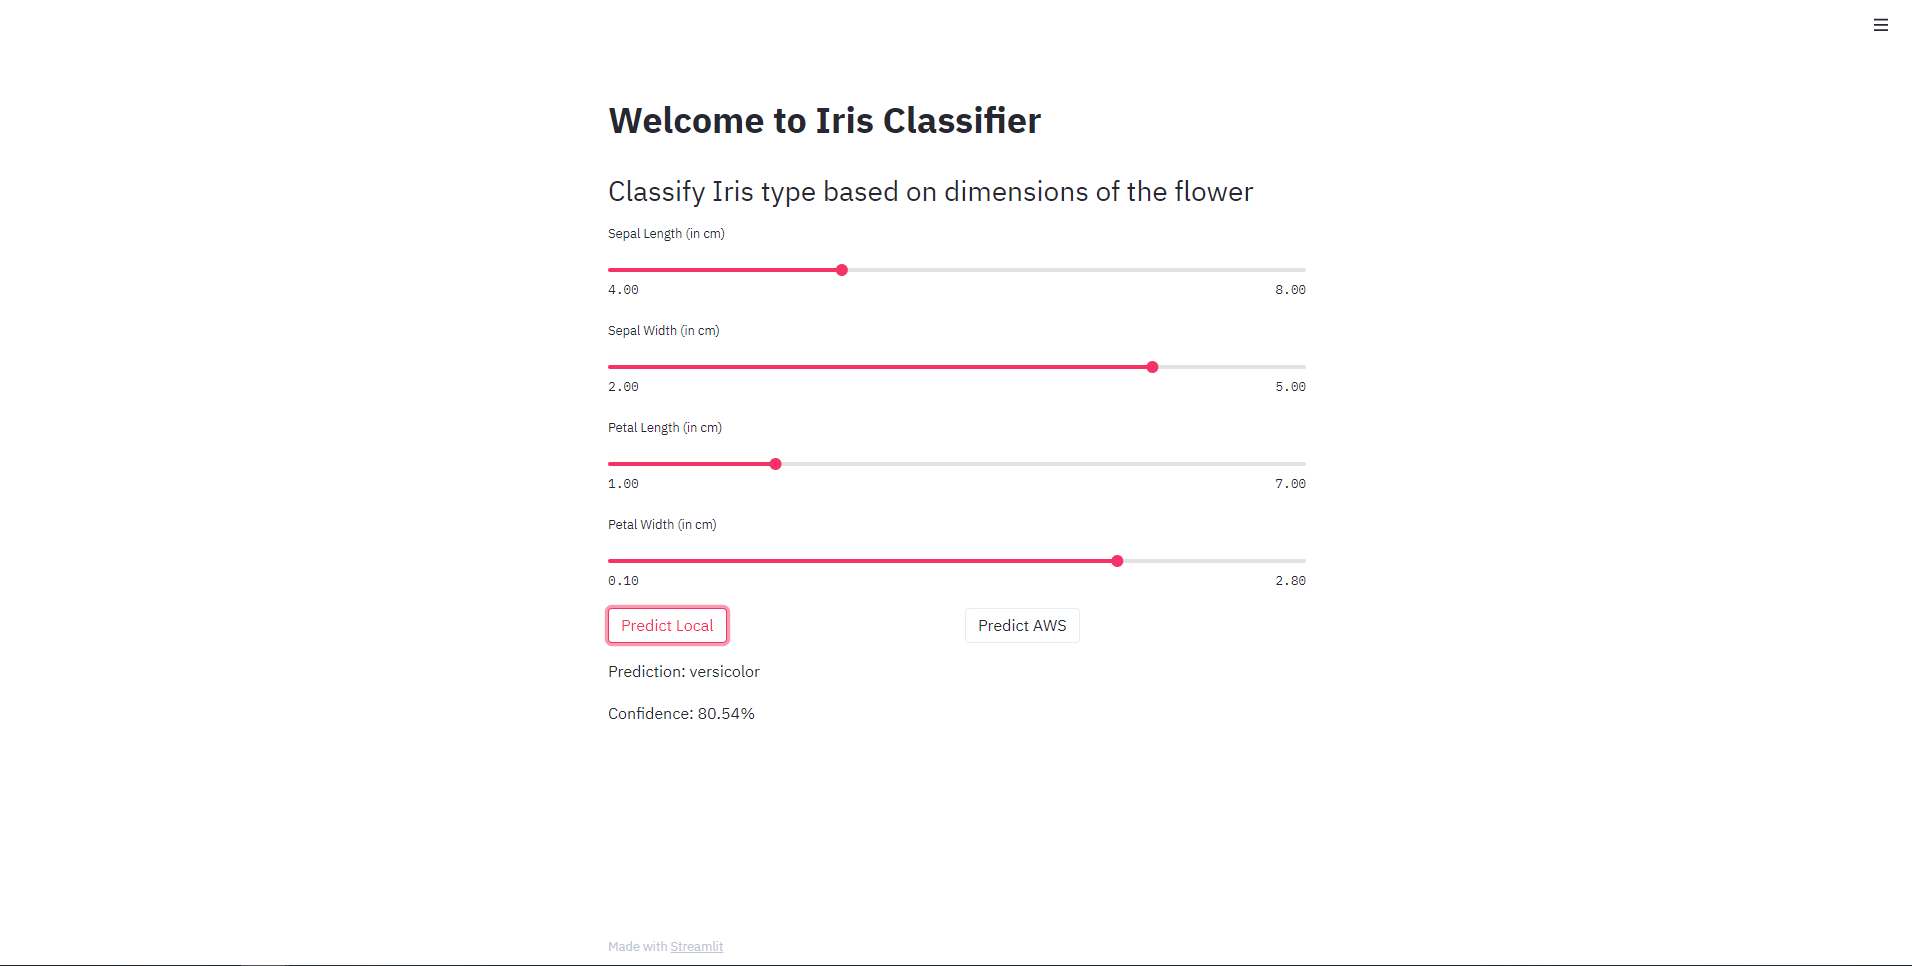
Right now, the Predict AWS button will give an error on clicking. It is required to set up an API of your own that the code will send the POST request to.
A main.py file contains the event handler which will be used by Lambda later.
2. Packaging the model
I have included a Dockerfile which is used to package the model. Later I will automate all this using Github Actions.
cd iris_classification
docker build --tag iris_classification:latest .
3. Push the Docker container to Amazon ECR
First, create a private repository. The free tier only allows for 500MB of storage in a month in a private repository.
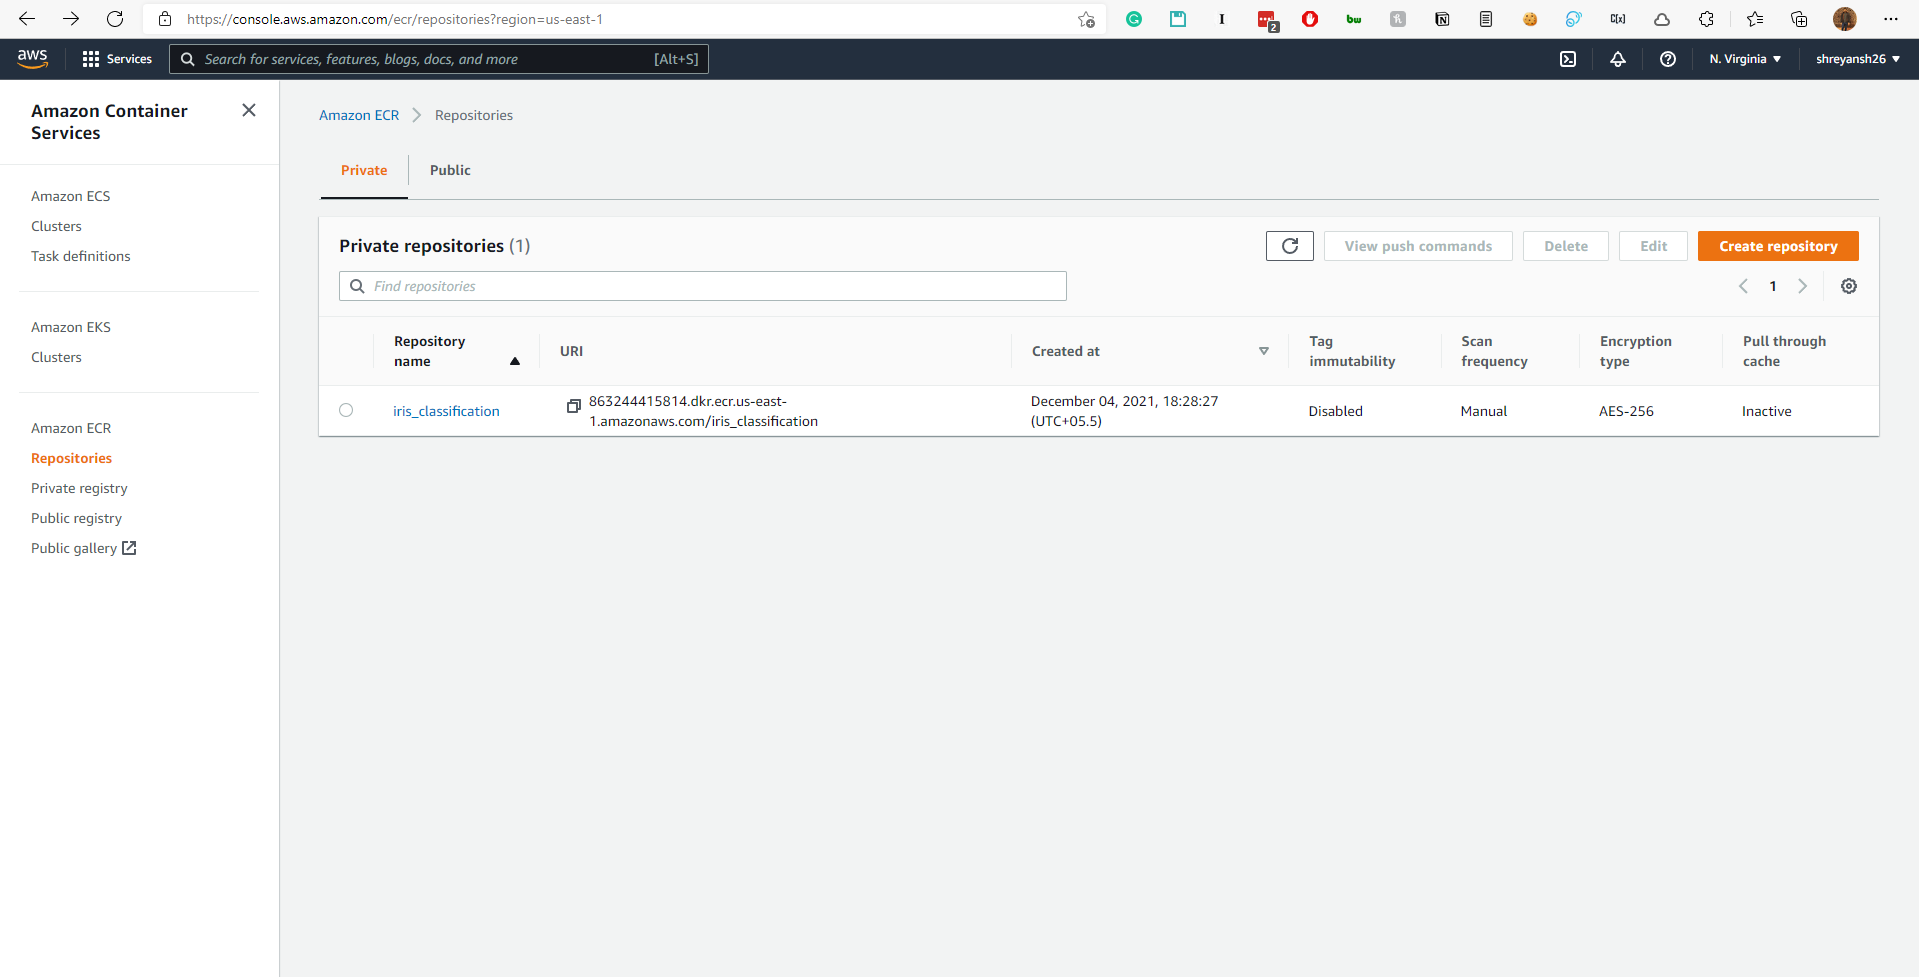
Use the following set of commands to push the local Docker container to the created repository.
aws ecr get-login-password --region us-east-1 | docker login --username AWS --password-stdin 863244415814.dkr.ecr.us-east-1.amazonaws.com

docker tag iris_classification:latest 863244415814.dkr.ecr.us-east-1.amazonaws.com/iris_classification:latest

docker push 863244415814.dkr.ecr.us-east-1.amazonaws.com/iris_classification:latest
You may have to run
aws configure
and provide your AWS Access Key ID and your AWS Secret Access Key to run the above commands successfully.
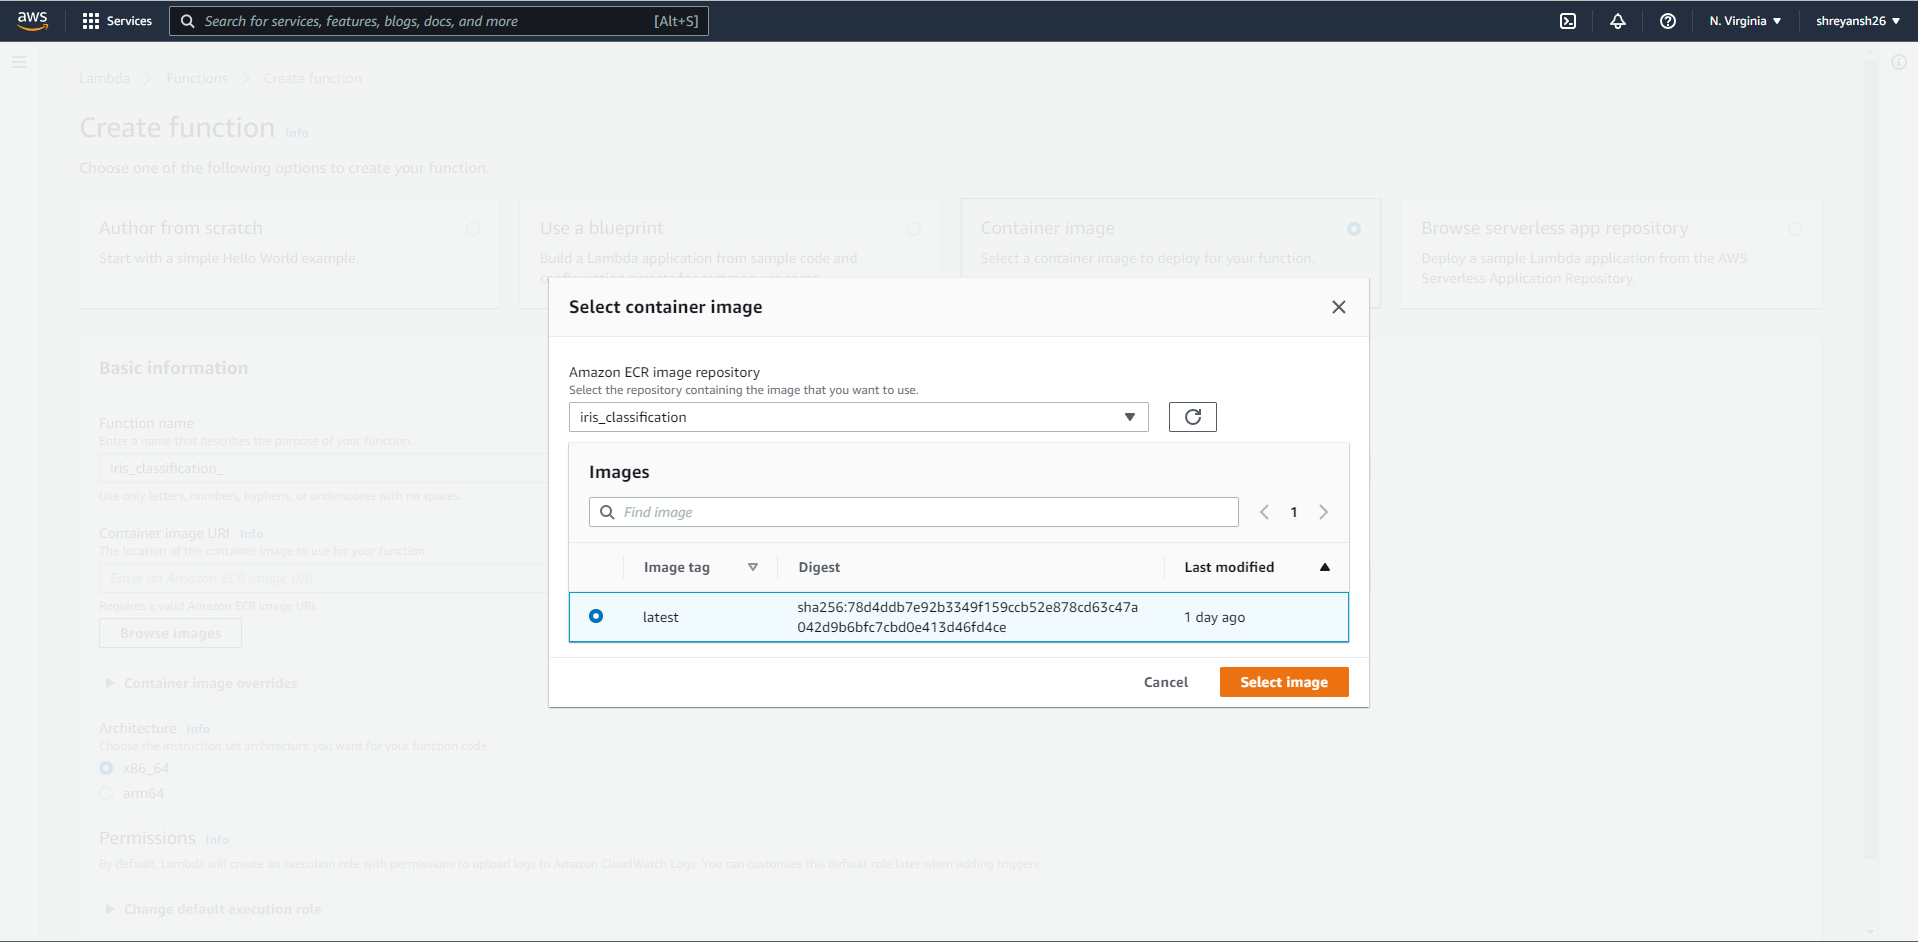
4. Create a Lambda function
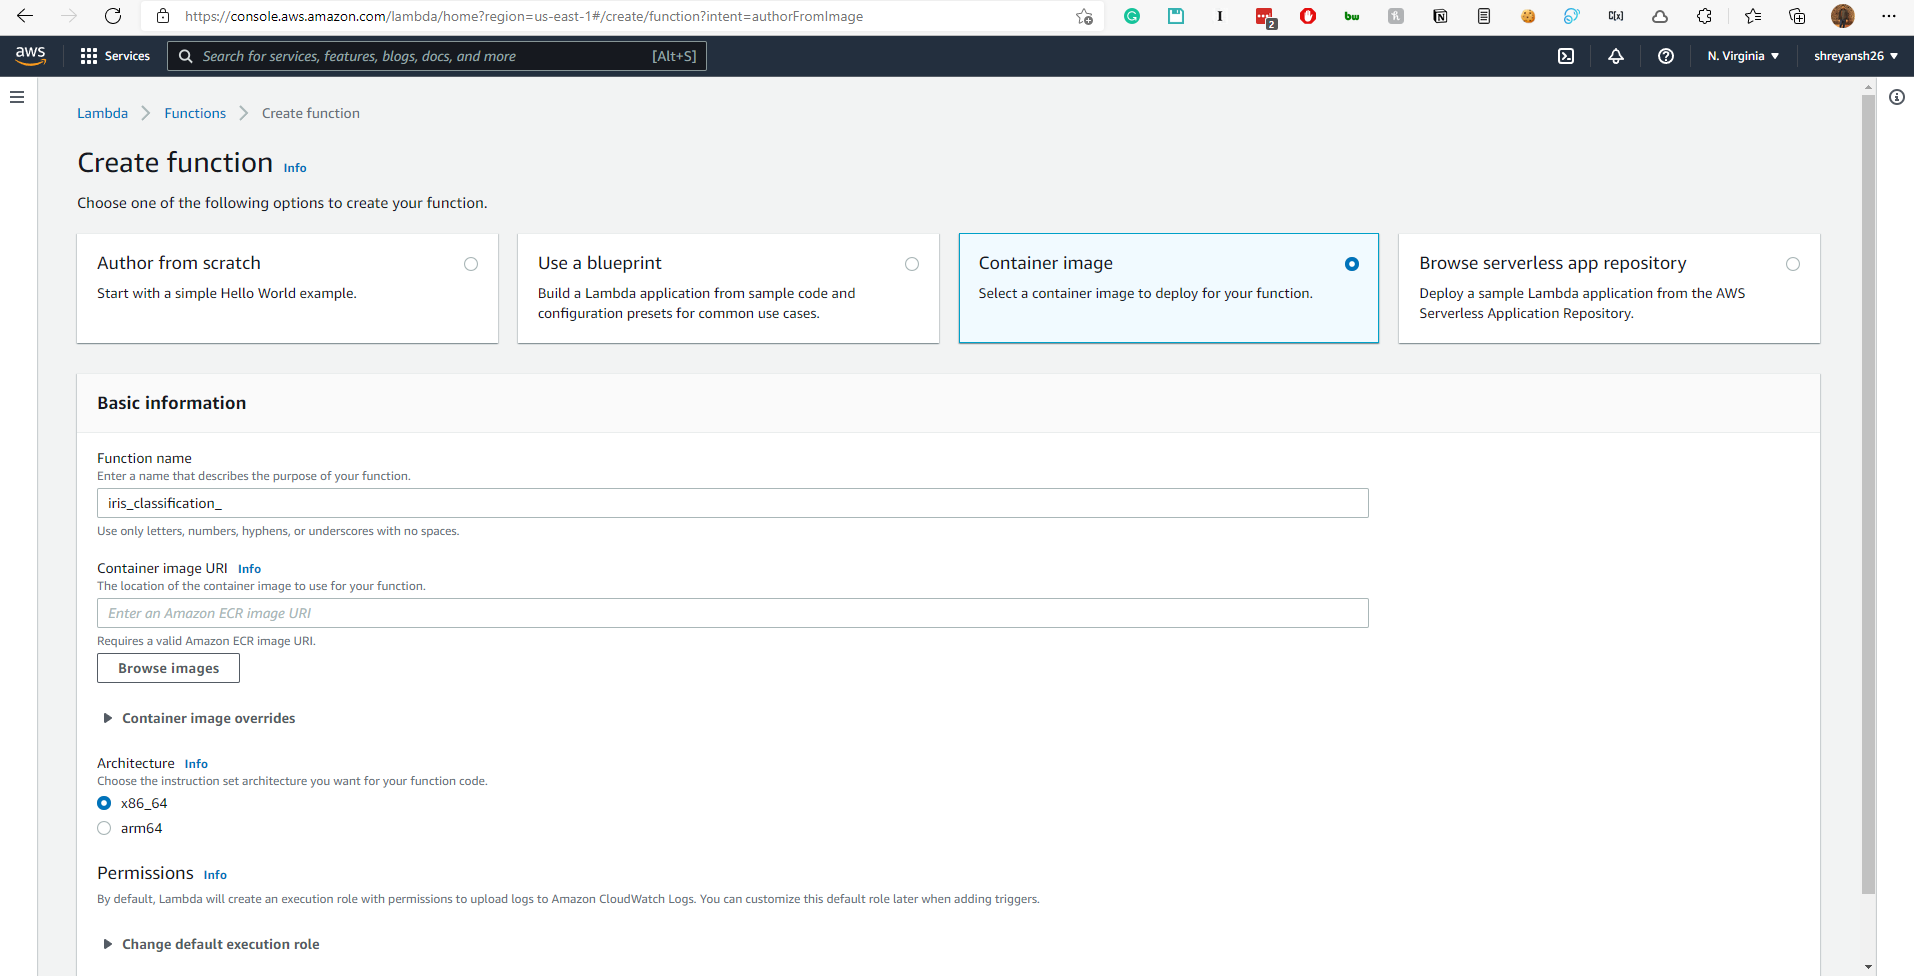
The container image URI can be selected from the AWS console itself.
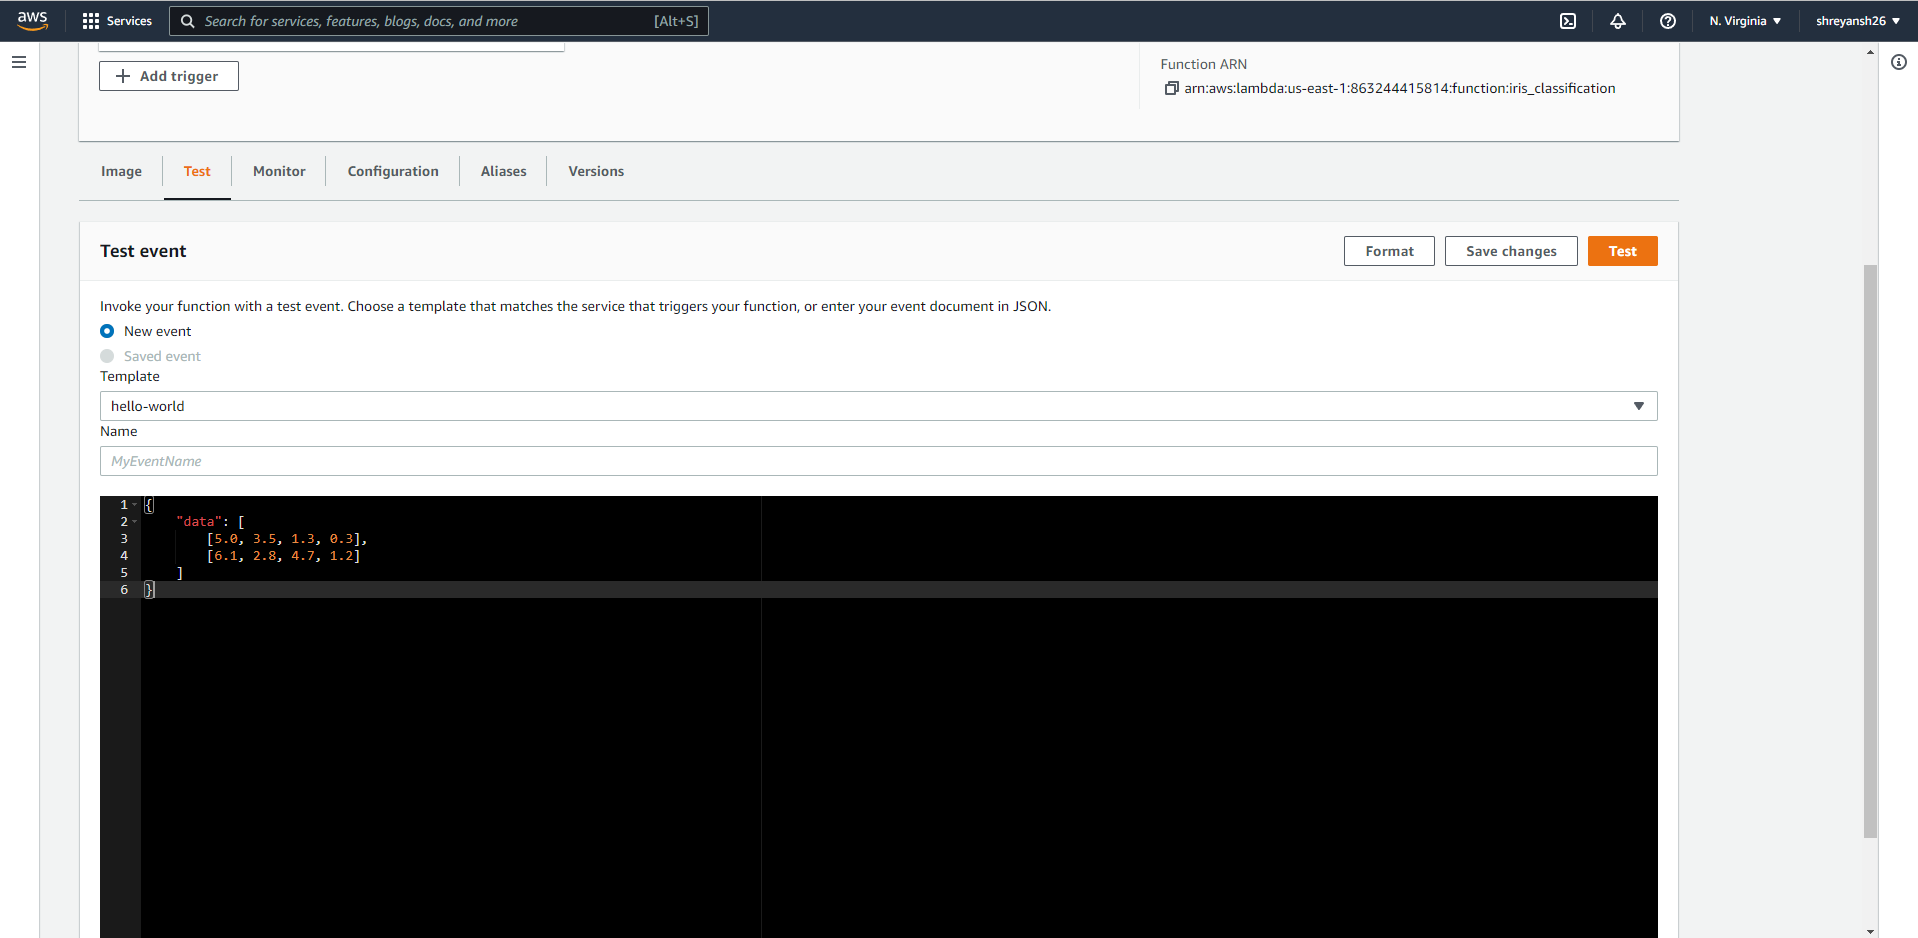
5. Test the Lambda
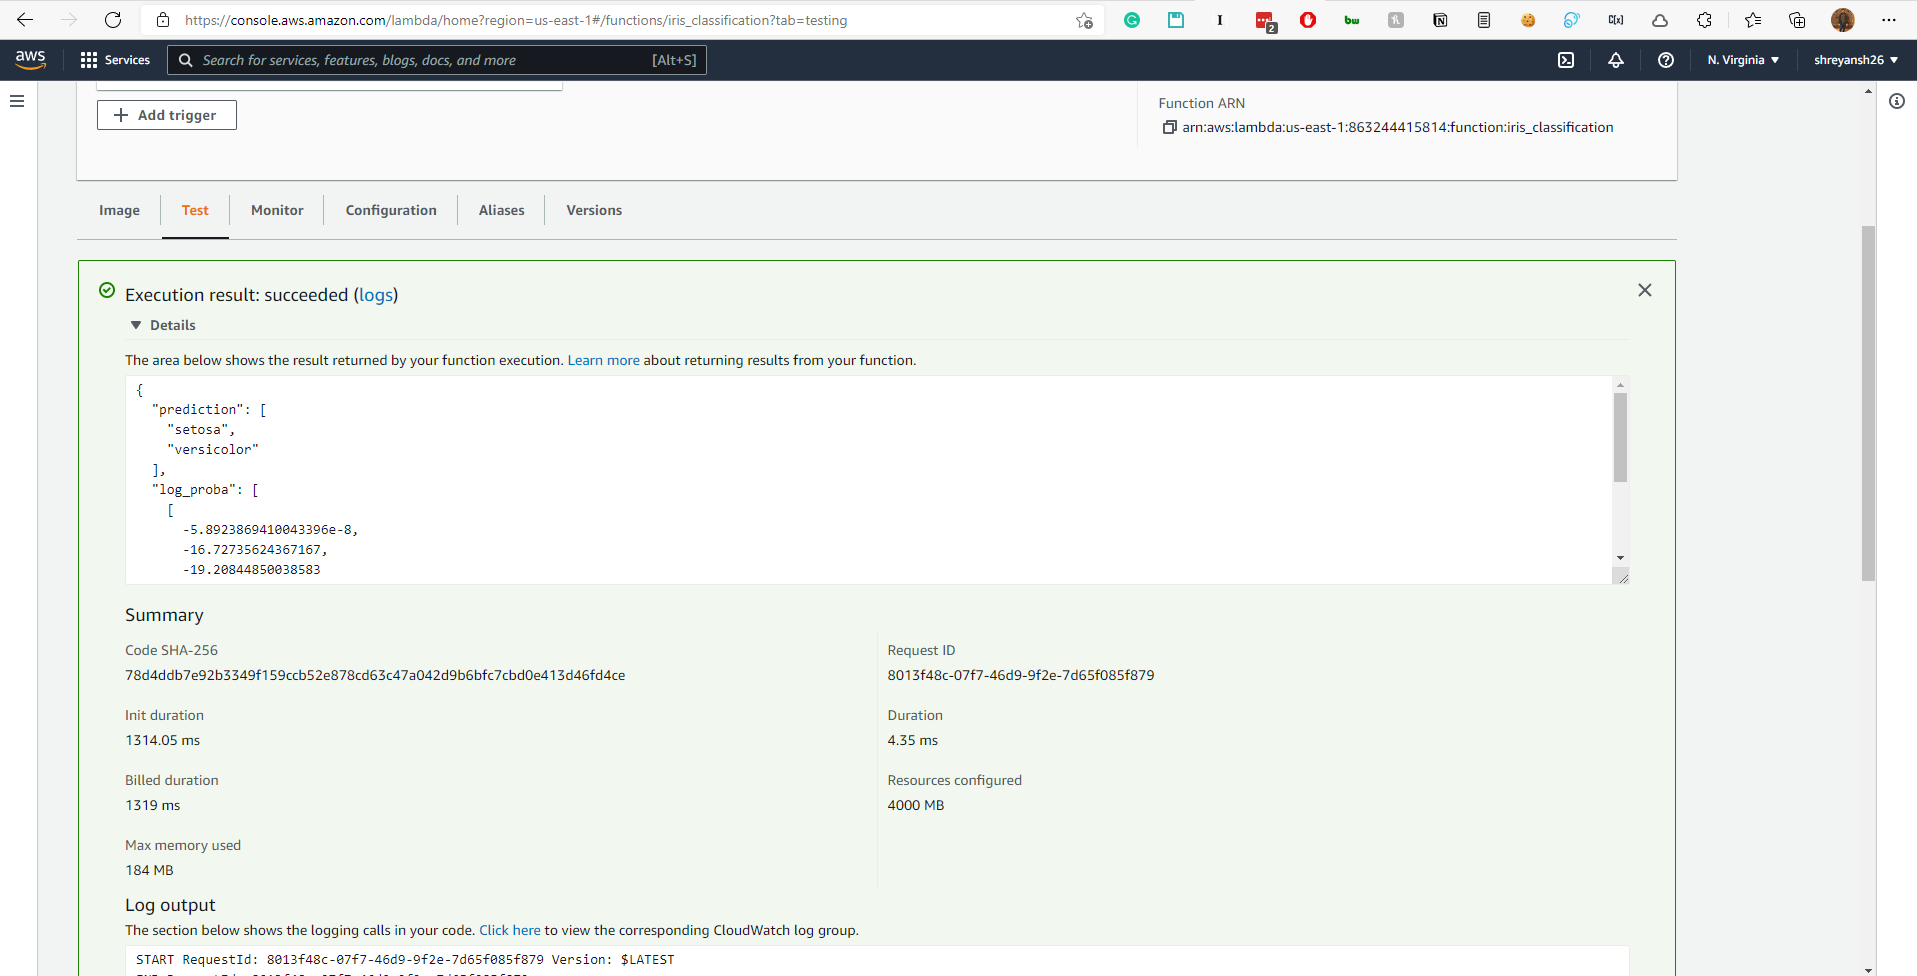
We can now test that the Lambda is correctly handling the request as we want it to. AWS allows for that. When we click on the Lambda function, it allows a Test option as well.
The test works and gives the correct result!!
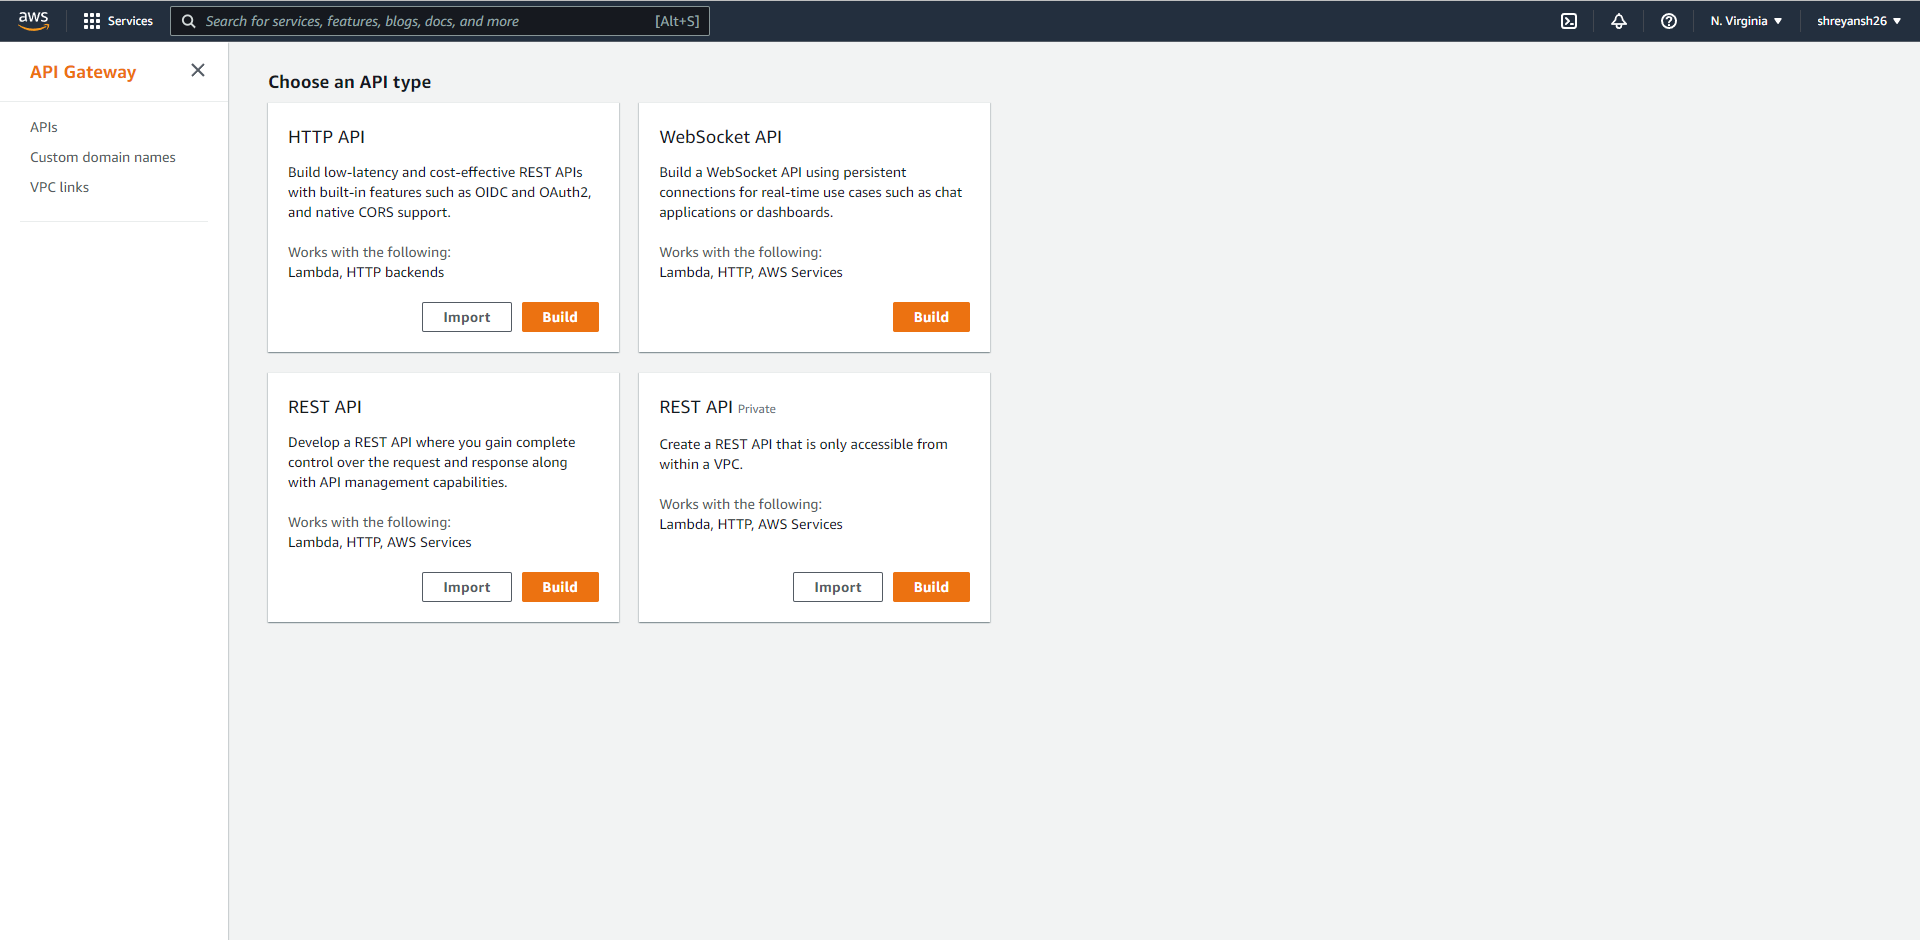
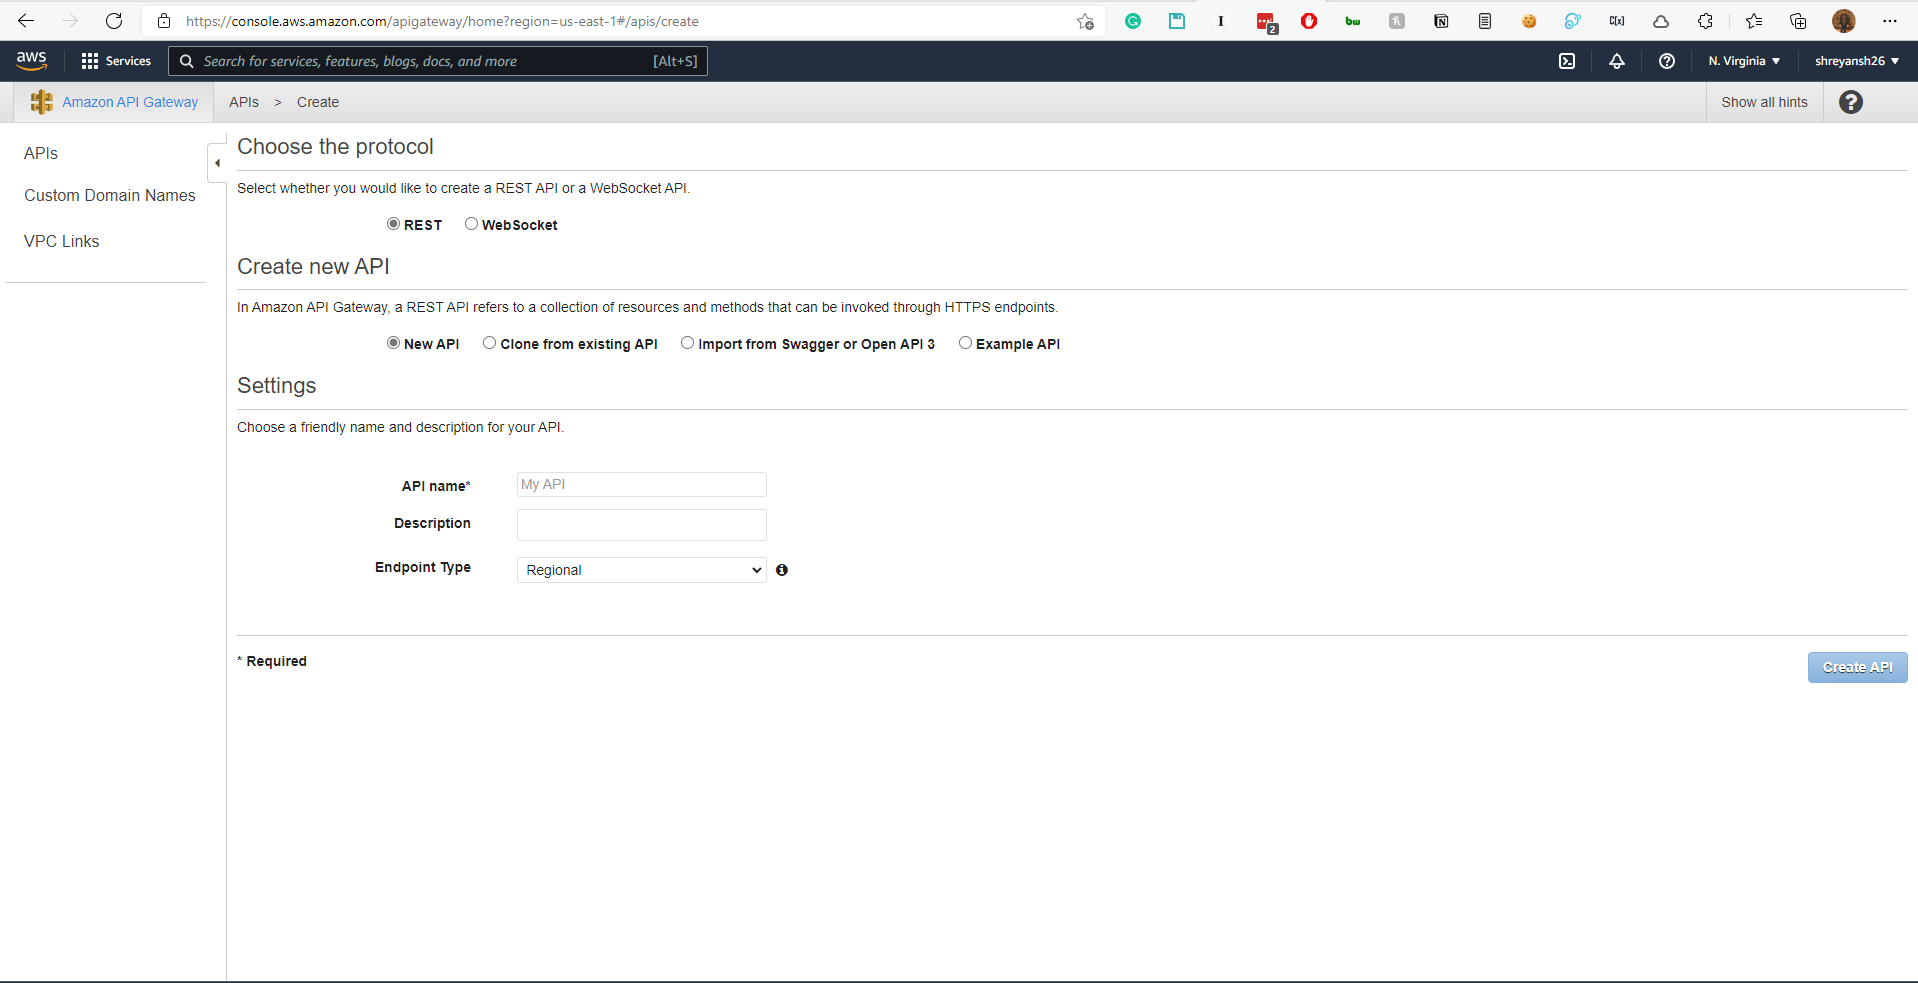
6. Create an API from the Amazon API Gateway
Make sure to make a REST API.
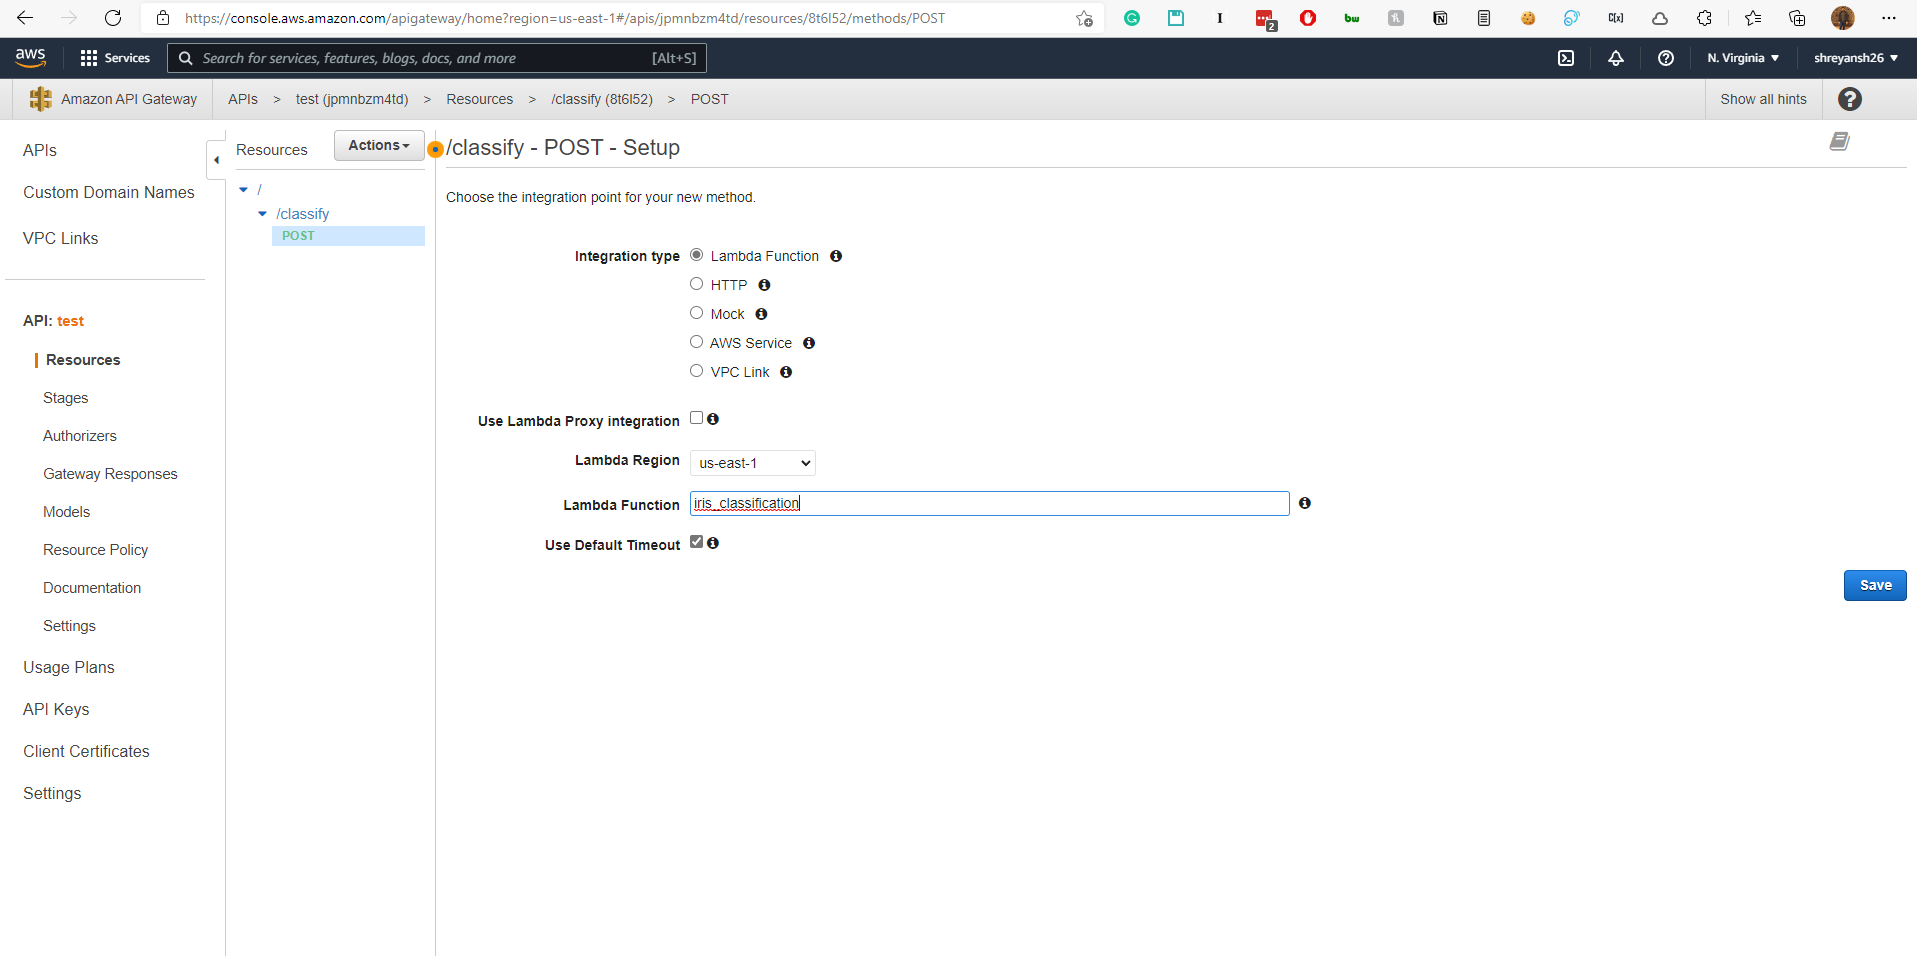
Add a /classify resource to the API and and add a POST method to the API. Add a POST request to the API under a /classify resource.
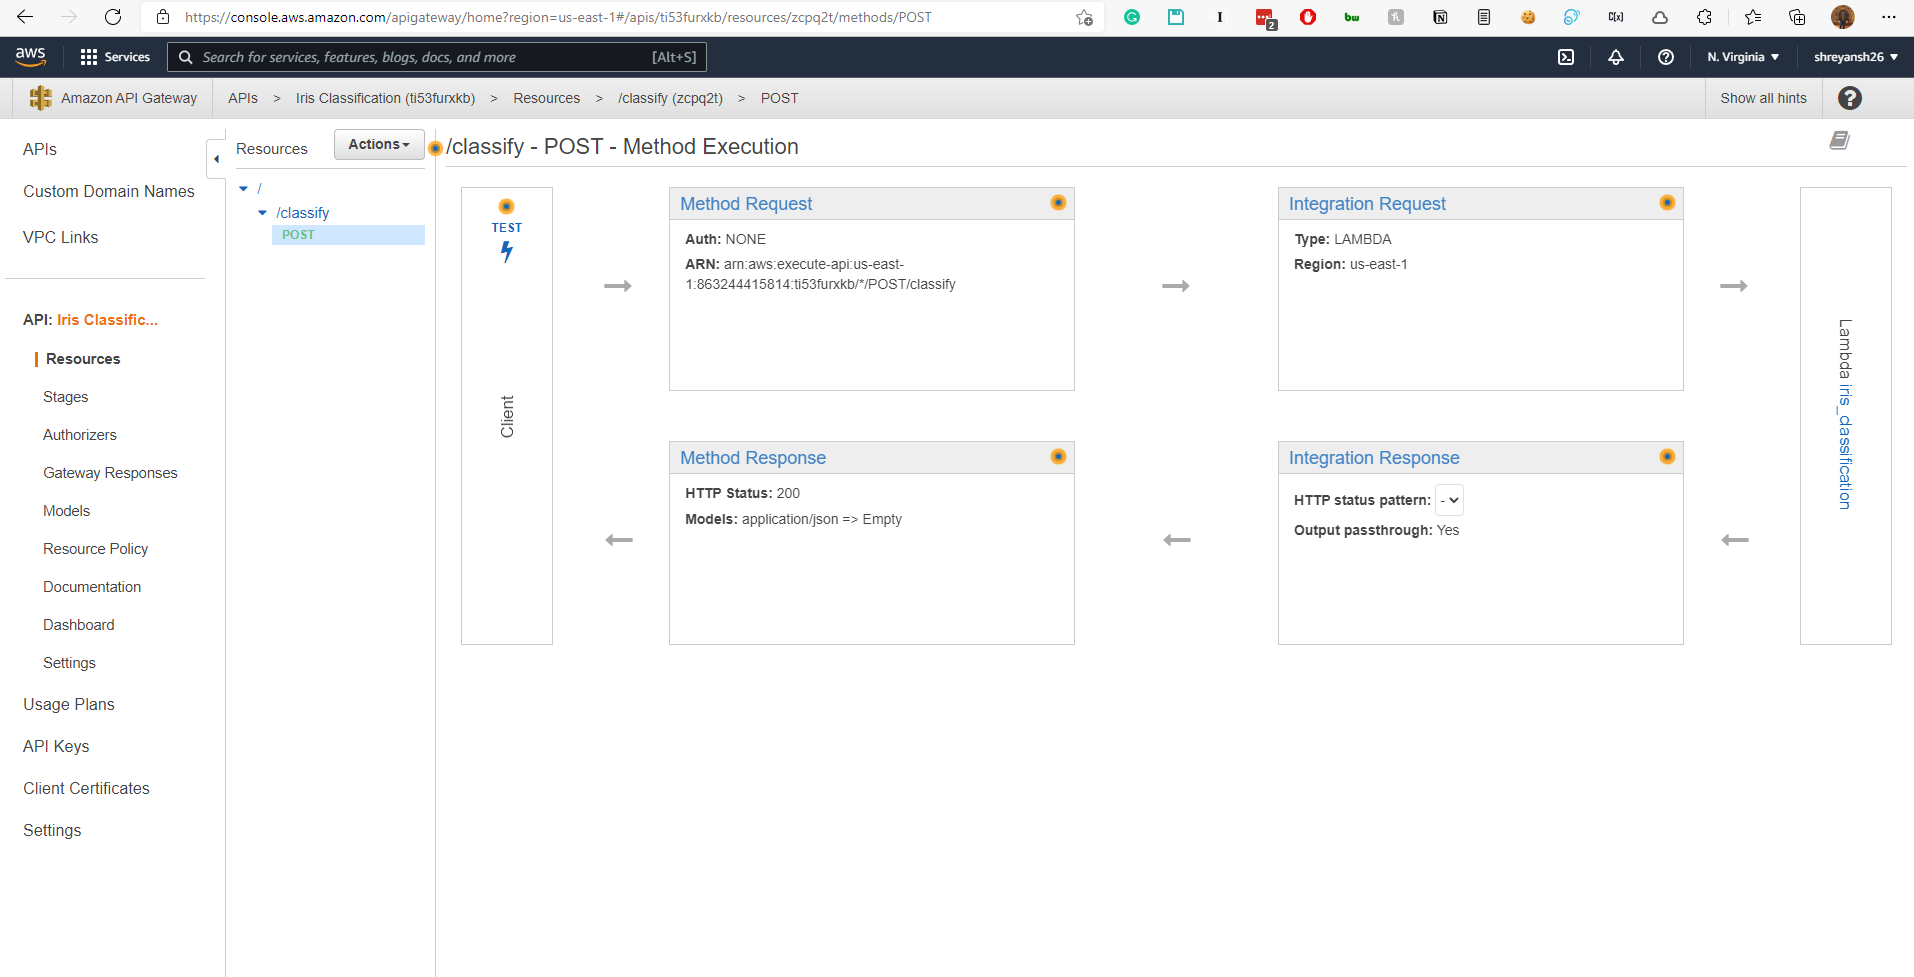
Integrate the Lambda function with the API.
Now, if you head back to the Lambda functions page, you will see that a Trigger has been added to the function.
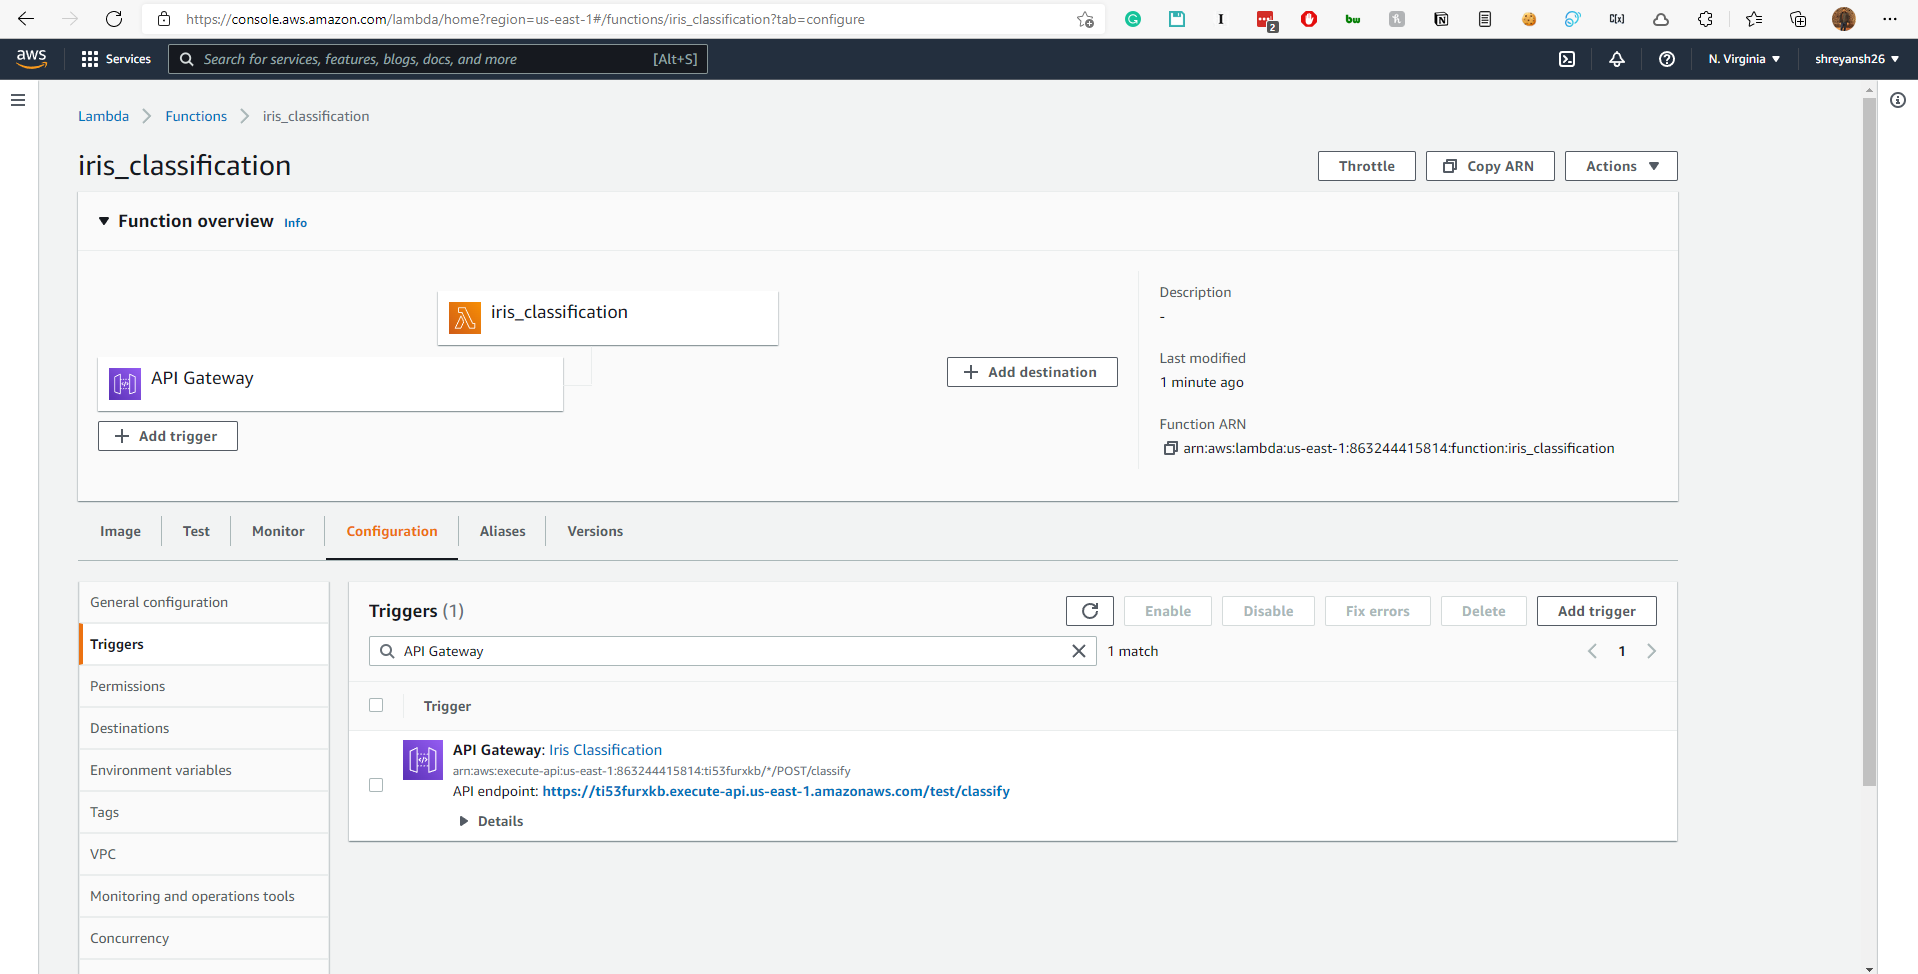
The endpoint is clearly visible in the screenshot. It will be something like https://{SOME_ID}.execute-api.us-east-1.amazonaws.com/test/classify.
7. Test the REST API
We use a client like Postman to check the API.
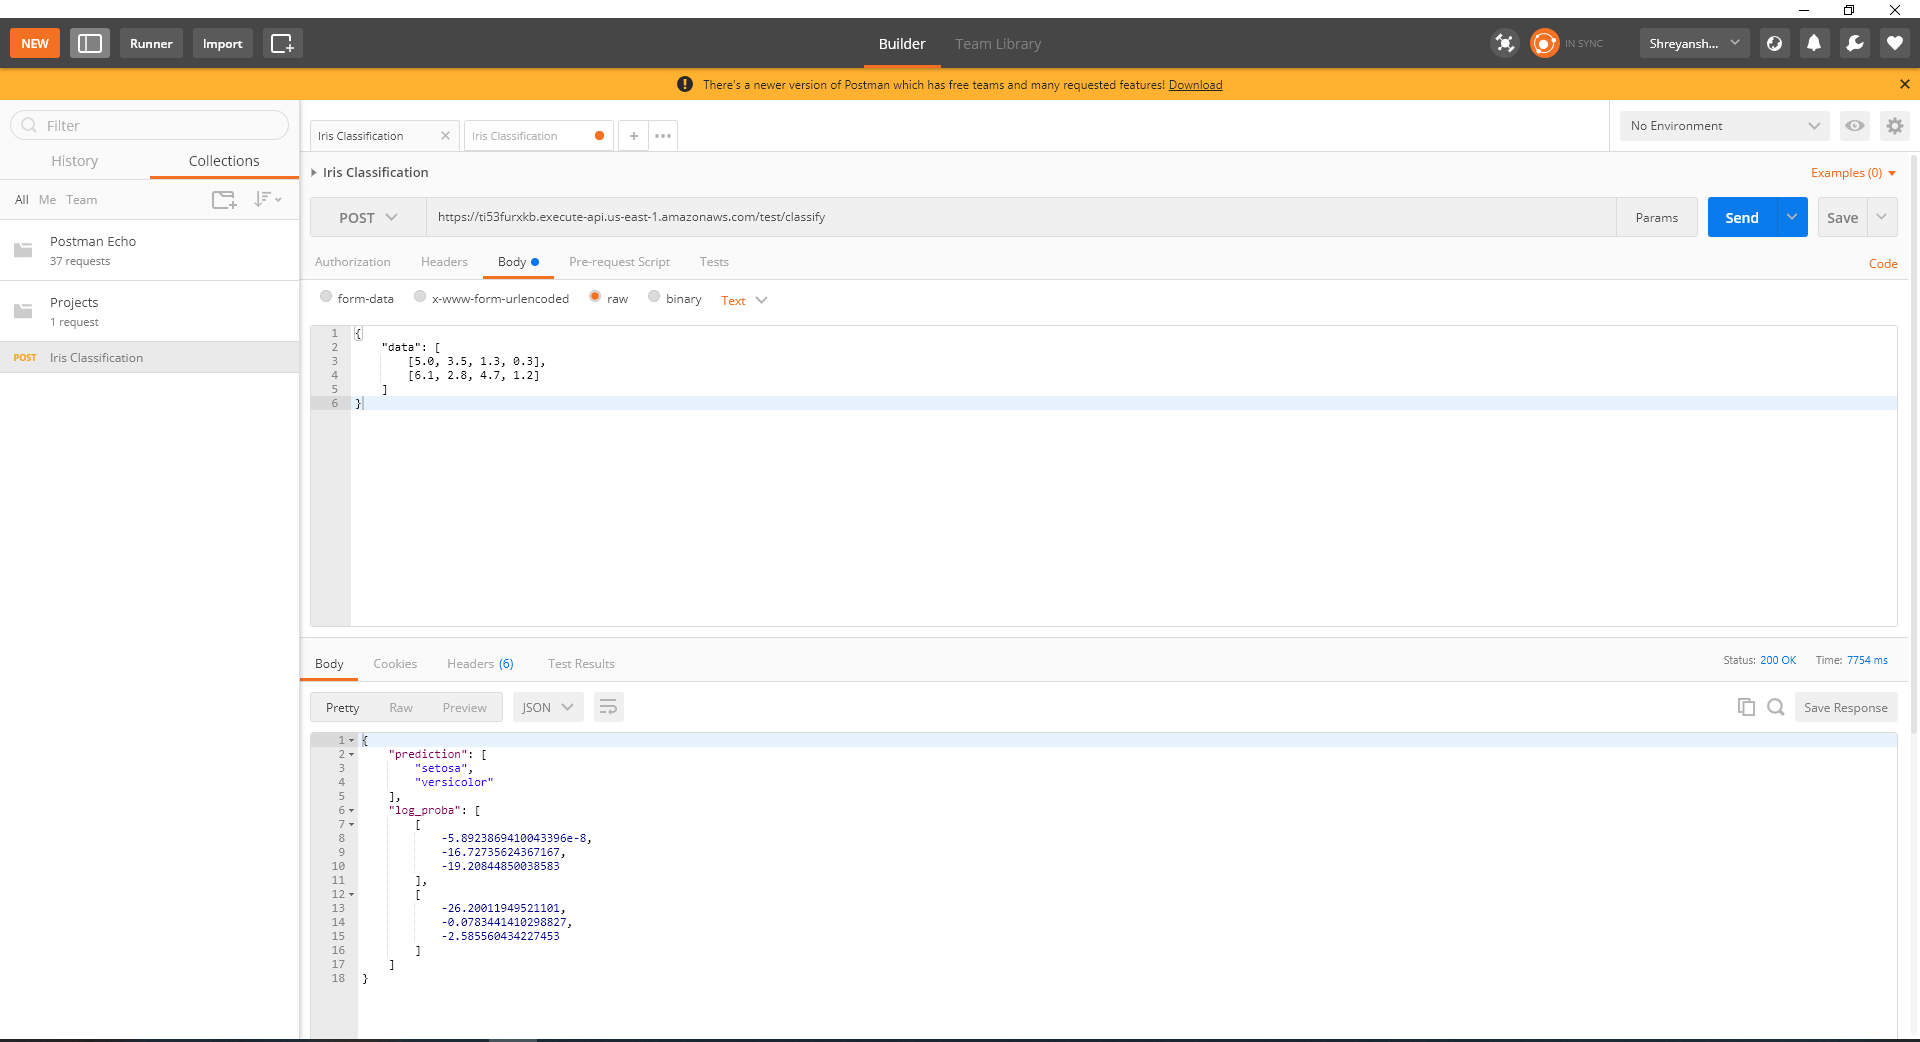
AND IT WORKS!
Programmatically, we can also check that the API works.
import requests

url = 'https://ti53furxkb.execute-api.us-east-1.amazonaws.com/test/classify'

myobj = {
    "data": [
        [6.5, 3.0, 5.8, 2.2],
        [6.1, 2.8, 4.7, 1.2]
    ]
}

x = requests.post(url, json = myobj)

print(x.text)
{"prediction": ["virginica", "versicolor"], "log_proba": [[-35.82910355985537, -1.5907654693356144, -0.22786665344763715], [-26.20011949521101, -0.0783441410298827, -2.585560434227453]]}
THIS WORKS TOO!
The above API URL and endpoint will not work for you. You should replace it with your own endpoint URL.
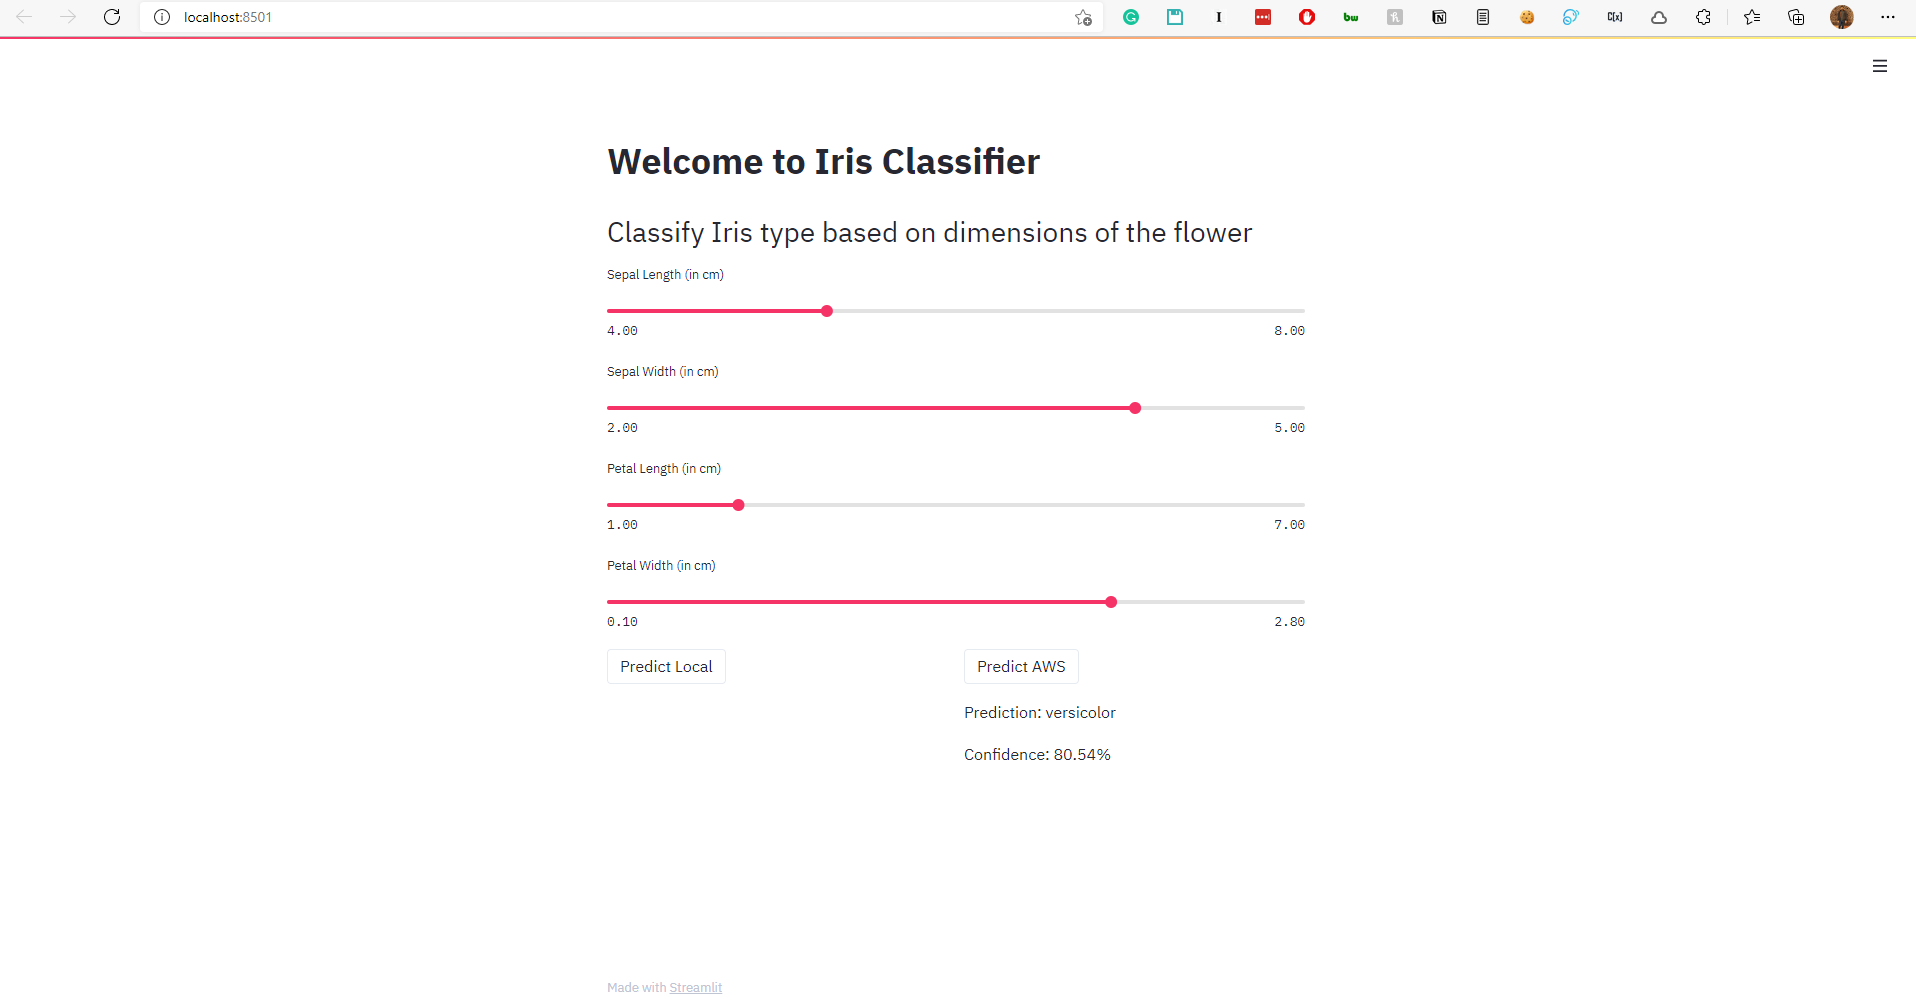
Streamlit app to test the model
After making the appropriate changes to the configuration, running
streamlit run app.py
allows you to get the predictions from the AWS hosted model as well.
Time to automate the whole thing using Github Actions
We use Github Actions to automate this whole process i.e. pushing the container to ECR, updating the Lambda function. The API then points to updated Lambda function automatically.
First, we will need to add the AWS_ACCESS_KEY_ID and AWS_SECRET_ACCESS_KEY to Github secrets (in the Github repo settings).
You can refer to the yml file in .github/workflows to see how the automation works. The Github Action is triggered when a pull request is made to the master branch.
If required, you can also restrict any pushes to the master branch from Github (link).
AND WE ARE DONE!
That’s all for now! I hope this tutorial helps you deploy your own models to AWS Lambda easily. Make sure to read the pricing for each AWS product you use to avoid being charged unknowingly.